Start guide
Install Scripting Nodes and build a small add-on with an operator and a sidebar panel.
Scripting Nodes builds Blender add-ons from node graphs. You connect nodes in a node editor, and Scripting Nodes writes the Python: operators, panels, menus, properties, handlers. The add-on runs in Blender while you build it, and it updates every time you change a node. When it's done, you export it as a zip that installs like any other add-on, without Scripting Nodes.
Build your first add-on
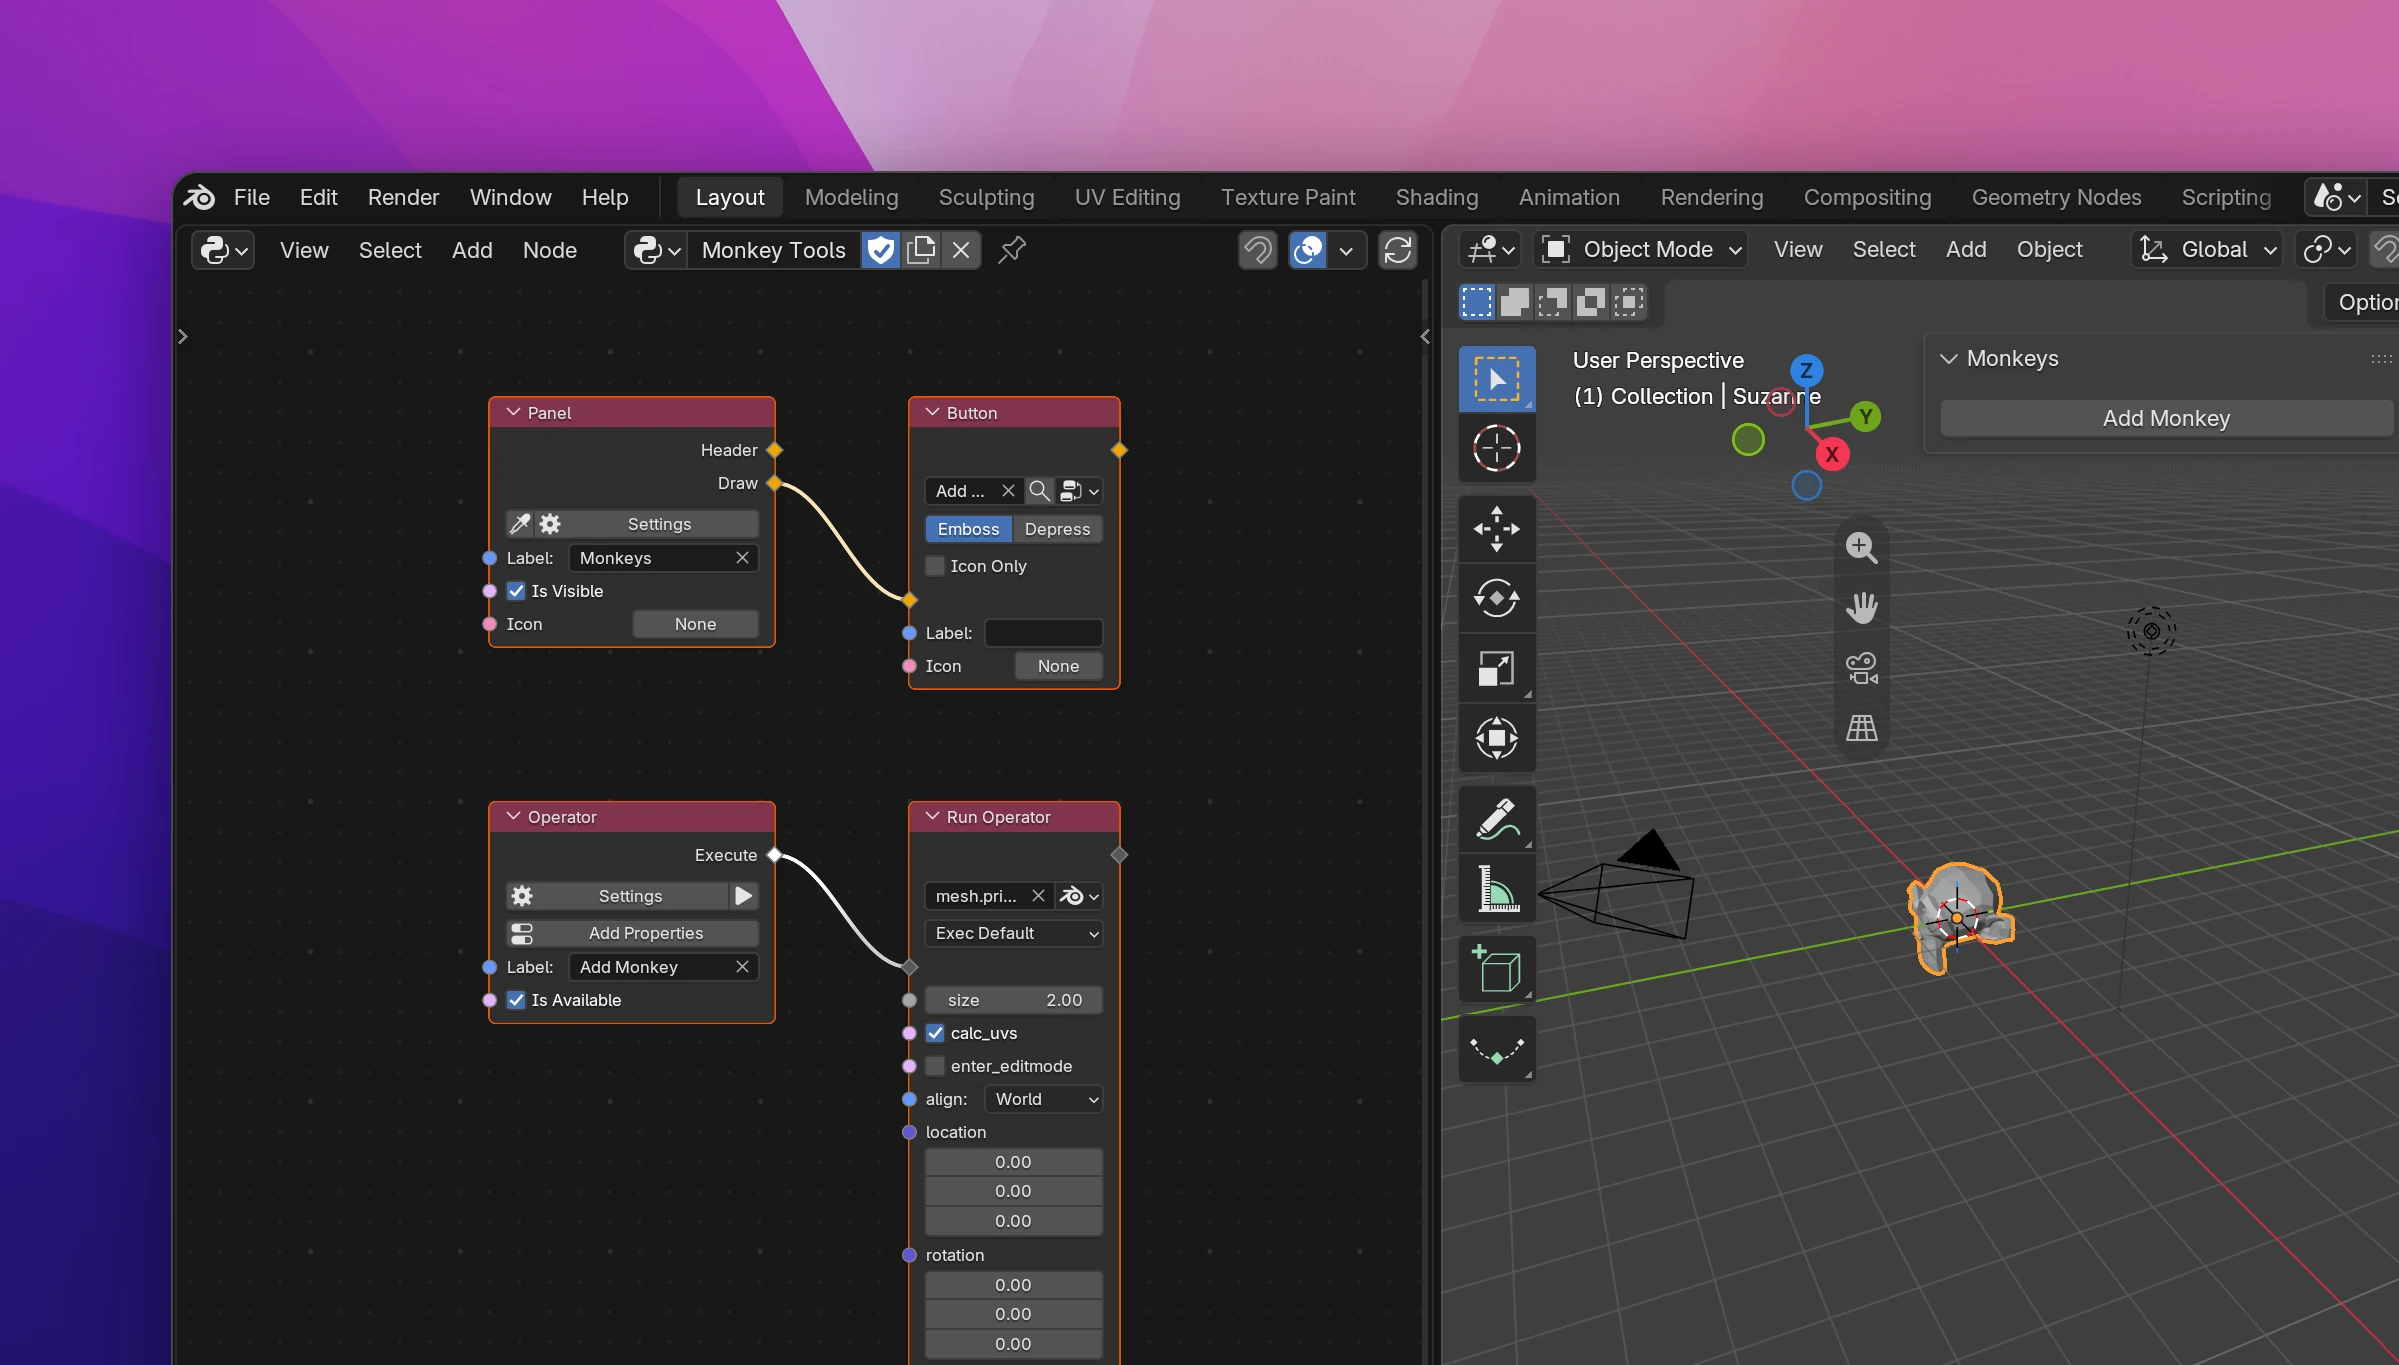
You'll make an add-on called Monkey Tools: a panel in the 3D viewport's sidebar with a button that adds a monkey to the scene. It takes four nodes.
Create a node tree
Install Scripting Nodes, then switch any area to the Scripting Node Editor (the editor type menu in the area's top left corner) and click New. Press N to open the sidebar and go to the Scripting Nodes tab.
Every .blend file holds one add-on, and a new file gets a random name. Type Monkey Tools into Addon Name. The panel's tab in the 3D viewport will be named after it.
Add an operator
An operator is the action behind a button. Add an Operator node (Add › Operators › Operator) and type Add Monkey into its Label. That's the name the button shows.
Add a Run Operator node (Add › Operators › Run Operator) to the right of it. The dropdown next to its operator field switches between This Add-on and Blender: choose Blender, then search for Add Monkey and pick mesh.primitive_monkey_add. The node gets an input for each setting of Blender's operator (size, location, ...). Leave them as they are.
Connect the Operator's Execute output to the Run Operator's flow input, the diamond on its left. Execute is what the operator does when it runs.
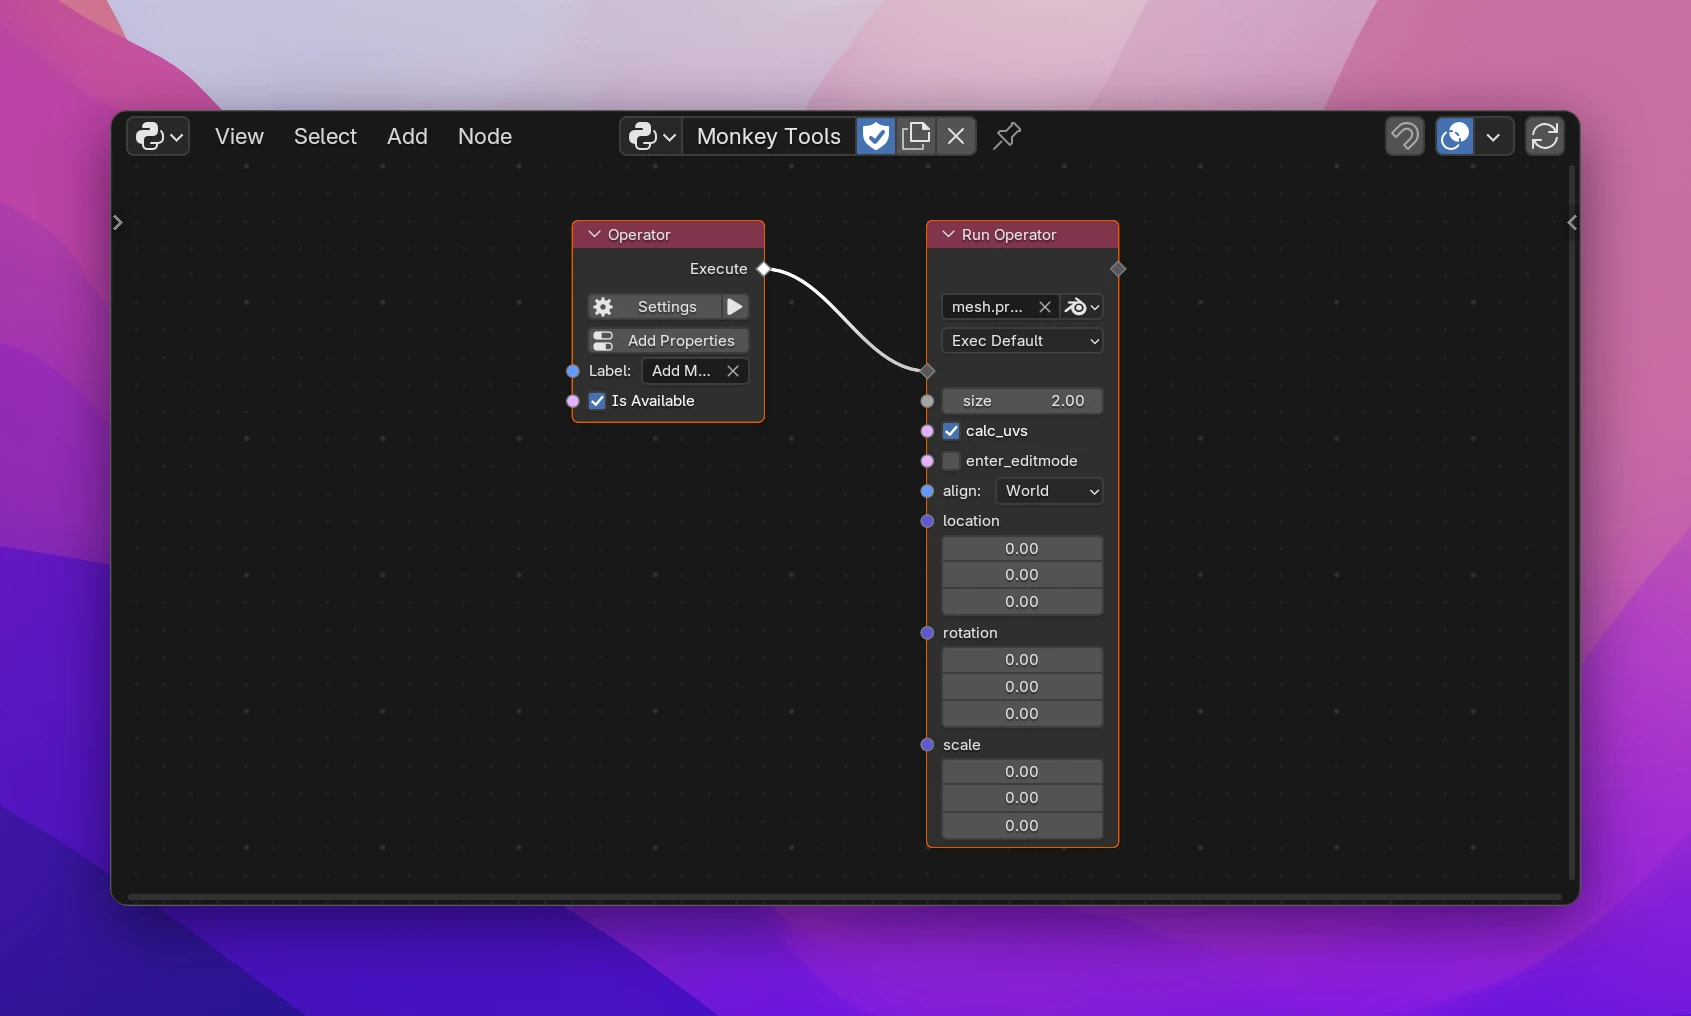
Click the play button next to Settings on the Operator node. A monkey appears in the scene. Your add-on is already running.
Add a panel with a button
Add a Panel node (Add › Interface › Panel) and set its Label to Monkeys. By default it's a panel in the 3D viewport's sidebar.
Add a Button node (Add › Interface › Button). In its operator field, pick Add Monkey, your Operator node. Connect the Panel's Draw output to the Button's input. The yellow sockets are interface flows: they draw the panel's content from top to bottom.
Use it
In a 3D viewport, press N and open the Monkey Tools tab. The Monkeys panel has an Add Monkey button. Click it.
Change something, for example the Operator's Label, and the button changes a moment later. There's nothing to reload: Scripting Nodes rebuilds the add-on after every change, see Live updates.
Trying out a flow
To run something without building an operator and a button first, use a Trigger node (Add › Events › Trigger). Its Trigger button runs whatever is connected to its output. Connect a Print node (Add › Flow › Print) and type a message into Text: clicking Trigger prints it to Blender's system console, and the node editor shows it in its top left corner for a few seconds.
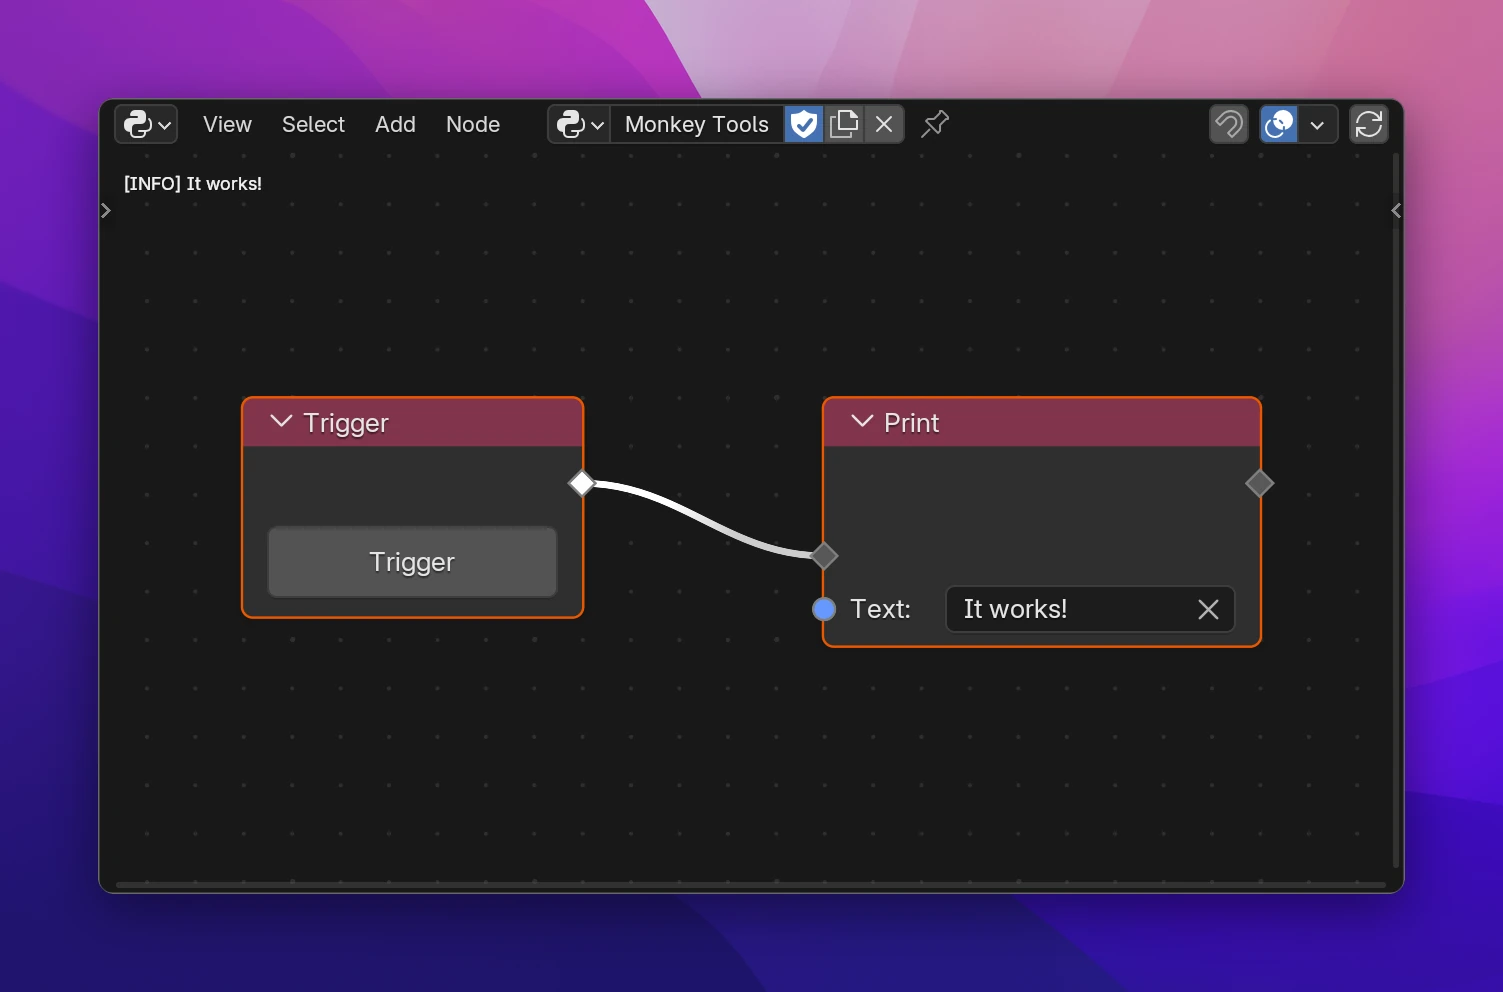
Trigger nodes are for testing while you build. They're left out when you export the add-on.